When you start a data science project in Python with your friends or collegues, what do you do at first? Start Jupyter Notebook? If you work alone and the project is just a hobby, then there is no problem. But if you work as a team member or you want to show the result to other people, then you should consider a "professional developing environment" for the project in order to work effectively and to show the result with less problem.
In this entry we would like to discuss how to start a Python project in a context of data science. To be rigorous: How to prepare your development environment. (If you are looking for a way to find a topic of your project, you should consult "How To Choose A Data Science Project For Your Data Science Portfolio".)
Assumption
0. The project is about an analysis
If you are a Python developer, then you should consult "The Hitchhiker’s Guide to Python".
1. The common programming language is Python.
You might be able to learn something for R from this entry, but we discuss only a project in Python. If you are interested in R, then the following libraries might be helpful. (I have not checked if we can do something similar with the following libraries in R.)
- checkpoint : to fix versions of libraries you use
- R Packages, Writing an R package from scratch : to create a module for R (tutorials)
- ensurer : to test your R-codes.
2. You work in a team.
If you work alone, then you do not need to care about the versions of libraries you use. It is OK to use the newest versions or the installed ones.
But if several people work on the same project, then different version of the libraries can cause a problem for reproducibility. (Your code might not work on the computer of your colleague or vice versa.)
3. You will show the result to someone (clients, public, interviewer, etc.)
An analysis which is not reproducible is the same as an application which is not working. Data Science is science. If you can not reproduce your result, your analysis is wrong. Nobody can make use of your result.
So you might want to show the result. It might be just a report, an application (library), or a presentation.
(But if you have to do a test for a job interview and the time you can spend is limited, then you should not care about the versions of libraries. You should use what you are familiar with.)
Step 0. Environment
Since I use Linux at home and Windows at work, I assume a Linux environment in this entry, but I use Anaconda, so that we can do the equivalent process on Windows. I also recommend PyCharm to prepare the project environment on Windows.
NB: We do not discuss Anaconda Project in this entry.
Problem: PYTHONNOUSERSITE
I installed Anaconda3-5.3.0-Linux-x86_64.sh under ~/anaconda3 by
following the official instruction. If you have installed libraries under
local or by pip install --user then you may have
a problem with sys.path.
Namely Python tries to import a library under ./local, even though you have
installed a (different version of) library.
My suggestion is to use only Anaconda. (But you do not need to uninstall
Python install on your system. If you installed Anaconda
and let Anaconda modify .bashrc, then your default Python will be
~/anaconda3/bin/python.) If you have site-packages under .local, then
you may need to make it unreadable.
chmod 000 ~/.local/lib/python3.*/site-packages
Or just delete.
Step 1. Version of Python
Is this obvious? I do not think so. Some people still want to use Python 2. Some platforms provided only Python 2. Since your code is going to be integrated to a system which is based on Python 2, you have to use Python 2.
Anyway if you have a right to choose a version, you should use Python 3. I recommend using 3.5 or higher, because typing is available (even if you do not use it.)
Let us use version 3.6 this time. Then we have to create an Anaconda environment.
$ conda create -n myproj python=3.6
Anaconda environment is just a Python environment with libraries. You can have a different environment for a different project. For example, you can use Python 2 with old libraries for Project A and use Python 3 with new libraries for Project B on a single machine.
Executing the above command, we create a new Anaconda environment and the
following command enables the Anaconda environment myproj.
$ conda activate myproj
The following command deactivates the Anaconda environment.
(myproj) $ conda deactivate
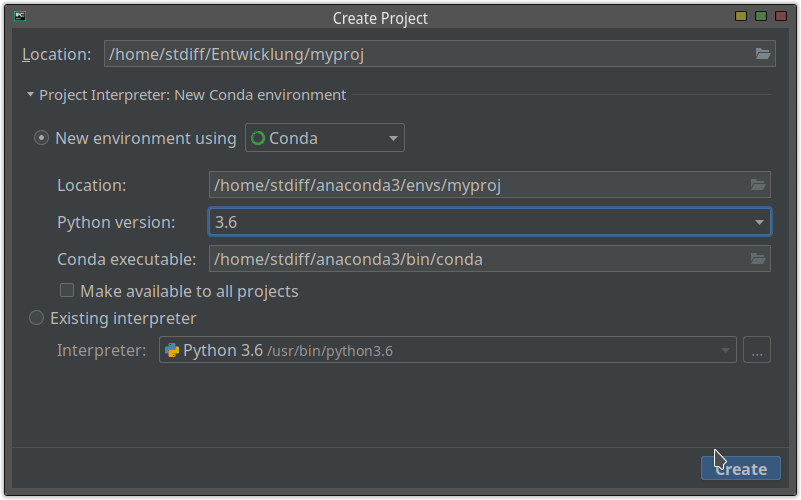
If you use PyCharm, you can create a new Anaconda environment by creating a new project: specify the project interpreter.

Step 2. Version of libraries
You can check the installed libraries by the following command.
(myproj) $ pip list
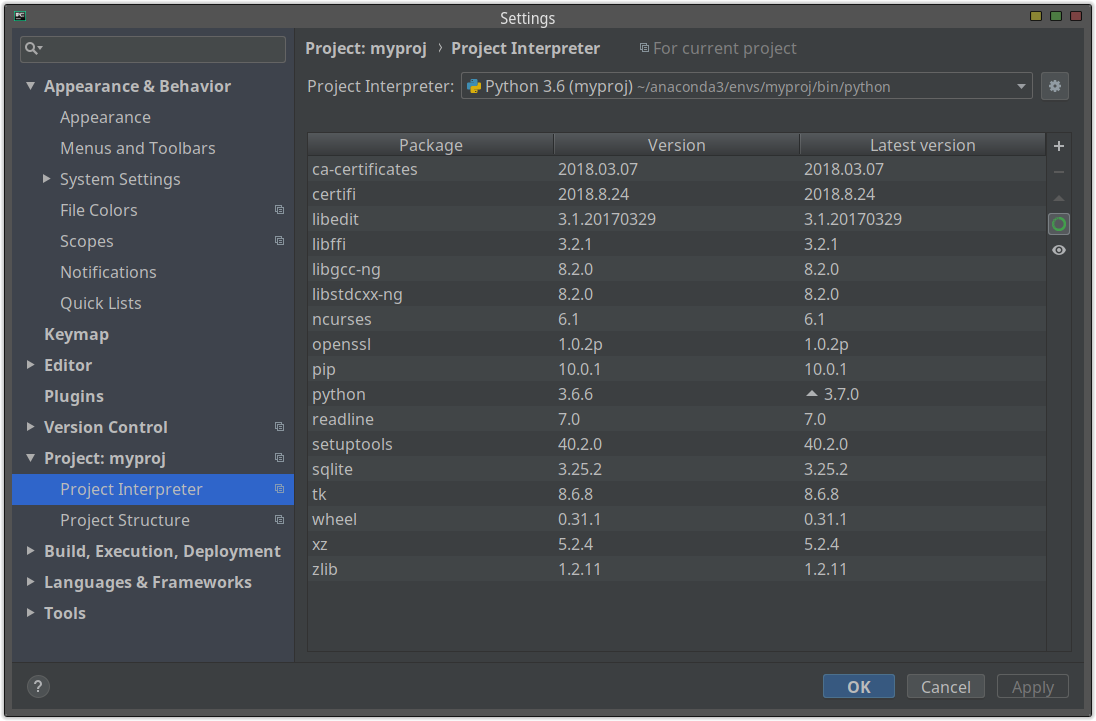
If you use PyCharm, you can see the similar information from
Project Interpreter.
(What PyCharm shows is the result of conda list.)
You find definitely that many libraries which you need are missing, so you
have to install lots of libraries. If you have no preference of versions of
libraries, then you might want to install the libraries you need. For example
jupyter, pandas, matplotlib, seaborn, and so on.
(myproj) $ pip install jupyter
The above command installs jupyter. You can install several libraries at
the same time:
(myproj) $ pip install pandas matplotlib seaborn scikit-learn
jupytext is the key library for this blog entry. Do not forget to install it.
(myproj) $ pip install jupytext
If you use PyCharm, you can install libraries from "Project Interpreter":
+ button top-right.

After installing the libraries, you can easily create the list of the installed libraries and their versions.
(myproj) $ pip freeze > requirements.txt
NB: I do not know the equivalent function of PyCharm. If you are working on Windows, then you need to start Anaconda Prompt, activate the environment and execute the same command.
The text file requirements.txt is used to install the same
libraries which you just installed. Namely you give the text file to your
colleague. She creates her own Anaconda environment (with Python 3.6) and
then executes the following command.
(myproj) $ pip install -r requirements.txt
Then she can work with the same versions of libraries. If she uses PyCharm,
then she opens requirements.txt after setting the project interpreter as the
Anaconda environment. She can see "Install requirement" top right. By clicking
it, she can install all libraries which are listed in requirements.txt.
NB: Her result of pip freeze might be slightly different from requirements.txt.
3. Version control
Before start to write a code, you should prepare a git repository. If you have not learned it yet, you should learn it as soon as possible. Try try.github.io, udemy or datacamp. (I did not try any of them.)
The reason why you should use git is following.
- You can separate a released version and development one.
- You can relatively easily merge several changes.
- You can keep application directory relatively clean. (You need/should not
create something like
main-old.py.)
Even if you work alone, you can still take some advantages.
Git is a version control application. But here the "version" does not necessarily mean a linear version such as 0.9, 1.0, or 2.3. A good illustration can be found at Atlassian.
In the diagram every node (commit) can be regarded as a version. You can make the flow more complicated, but this diagram shows a very standard flow and this is necessary and sufficient for an "ordinary" data science project.
In the diagram there are two special branches: master and development.
- The master branch contains the released version.
- The development branch contains accepted changes.
When you start to create a change, you have to create a new branch from the development branch and work on it. After implementing a feature, you send a "pull-request" to another colleague and ask to check the code. At some point (typically the end of a sprint), you merge the development branch onto the master branch, so that you release a new version.
By the way the most important thing is to reach a consensus on how to use branches. Before starting the main development phase, you should talk other colleagues about it.
You might also want to have a "remote" git repository such as GitHub, GitLab or BitBucket, so that several people can work together. Your company or client provides "usually" one of them. If not, then you should
- install GitLab Community Edition or
- use a directory on a common storage as a git repository.
Probably I should briefly explain the second solution. I created directory
~/Entwicklung/myproj for a project. I initialise a git repository by
$ git init
Then I write the project description in README.md and commit it. I create a
directory ~/workspace, move in it and execute
$ git clone ~/Entwicklung/myproj/
This command copies the original git repository, so you have now the cloned
directory ~/workspace/myproj. If you work under the directory and execute
git push, then your change can be also found under ~/Entwicklung/myproj.
Therefore you can create a "central" git repository on a common storage or Dropbox, so that you can easily share a git repository.
If the first solution is available to you, you should chose it, but if not, the second solution might be a help.
4. Project Structure
Here a project structure is just
- a structure of directories under the project root and
- rules of the files under them.
A project structure depends on a project and it is difficult to find the best project structure. The following websites are quite helpful to get some ideas.
- Hitchhiker's Guide to Python
- What is the best project structure for a Python application?
- Cookiecutter
Anyway we have just an analysis project. Let's look at the smallest project structure. If you need more, it is enough to add them.
├── .gitignore
├── data/
│   ├── test.csv
│   └── train.csv
├── exploratory/
│   ├── 01-simple-analysis.ipynb
│   ├── 01-simple-analysis.py
│   └── style.html
├── README.md
├── requirements.txt
└── tmp/
A short/detailed project information might be found in README.md.
We have already discussed what requirements.txt is.
There are four directories.
data/
As the name describes, you put here the data to analyse. The data can be CSV files for training and test, an SQLite3 database, tons of media files such as image, XML files, JOSN files or I don't know.
The most important thing is that git should ignore the content of the directory. Why? One of the obvious reason is that (raw) data for analysis does not suit the version control. If the data changes, then the results of your analysis changes as well. Your data must be consistent. If you have a new data, then you have to inform all of your colleagues about it and replace old data with new one.
NB: How do you manage the version of your data? If you retrieve the
data from a RDBMS, then you have to put your query for example under lib/
and write in README.md when you retrieved the data.
There are other reasons why nobody should put a (raw) data in a git repository: It can be very big, it might contain personal information, or it is not allowed to distribute the files in Internet. As a data scientist you have to be careful about how to deal data.
But it is obvious that the data is needed to reproduce your analysis. Or you might need to give the data at least your colleagues. There are two options (or both).
- Share the data through a storage service or a common storage. Compress it with a password if necessary. Take the hash value(s) if possible.
- Write how you can get the data in
README.md.
exploratory/
The name is just an example, it can be analysis for example. But this
directory is the main place to analyse your data. Notebooks are stored here.
But *.ipynb files under this directory should be ignored from git.
The reason will be discussed in the next section.
By the way the HTML file style.html is used in the following way.
from IPython.display import HTML
with open("style.html","r") as fo:
    x = fo.read()
HTML(x)
Try this If you like this idea.
tmp/
The files under this directory should be ignored by git. And this directory is the place where you can put any files you like. Typical usage is to put a text file containing a list of commands you need for the job. Or some documents (such as a manual) which you do not edit. Or you might write quickly codes to check something.
The point is that the files under this directory are independent of the branch, so that you can still look at the same file whichever branch you are on.
This directory is quite convenient, isn't it?
.gitignore
Your .gitignore looks like following.
## user directory
tmp/*
data/*

## PyCharm
.idea

## relevant to Jupyter
exploratory/*.ipynb
exploratory/.ipynb_checkpoints/
5. Jupyter Notebook
You have a data science project. So you may need to use Jupyter Notebook for exploratory analysis. There are three options:
- use the ordinary web application,
- use Jupyter via PyCharm or
- use both.
All of them have pros and cons. But the important thing is that we need jupytext to make use of git.
GitLab/Hub supports Jupyter Notebook! A notebook file can be shown on GitHub like this!
No, I mean, Jupyter Notebook is very awkward to combine with git, because a Notebook file is actually in a JSON format. Your colleague modified your notebook, pushed it onto the repository and sent you a pull request. Then you have to compare two JSON files, not user friendly HTML files.
If it is OK for everybody to compare JSON files, then you do not need to use
jupytext. If not OK, use jupytext.
jupytext provides a conversion between a notebook and (for example) a Python
script. So if you have a corresponding Python script, you can recover the
original notebook from it (except outputs). Therefore you add the Python
scripts to the git repository and ignore notebooks, so that you can manage
notebooks through the paired Python scripts. As the
demo shows,
you might also directly edit the paired Python script.
Let us configure Jupyter for jupytext. The command
(myproj) $ jupyter notebook --generate-config
creates ~/.jupyter/jupyter_notebook_config.py if it has not existed.
Then you add the following two lines.
c.NotebookApp.contents_manager_class = "jupytext.TextFileContentsManager"
c.ContentsManager.default_jupytext_formats = "ipynb,py"
Just it.
If you have a paired Python script, you can recover the notebook by the following command.
(myproj) $ jupytext --to notebook your_notebook.py
If you want to convert a notebook manually, the following command does it.
(myproj) $ jupytext --to python your_notebook.ipynb
5.1 use Jupyter Web application
You know how to use Jupyter, so I have nothing to say except the following points.
- The paired Python script is created by saving the notebook. Do not forget to click "Save" button before create a commit.
- Sometimes this functions is not working. Then you need to convert it manually. Care about the timestamp of the last modification.
- What you have to add to commit is a paired Python script. Not the notebook.
- If you want to keep/share the result, you might want to
- export an HTML-file and share it, or
- make a copy of the notebook, put it under another directory and forbid to modify it.
5.2 use Jupyter via PyCharm
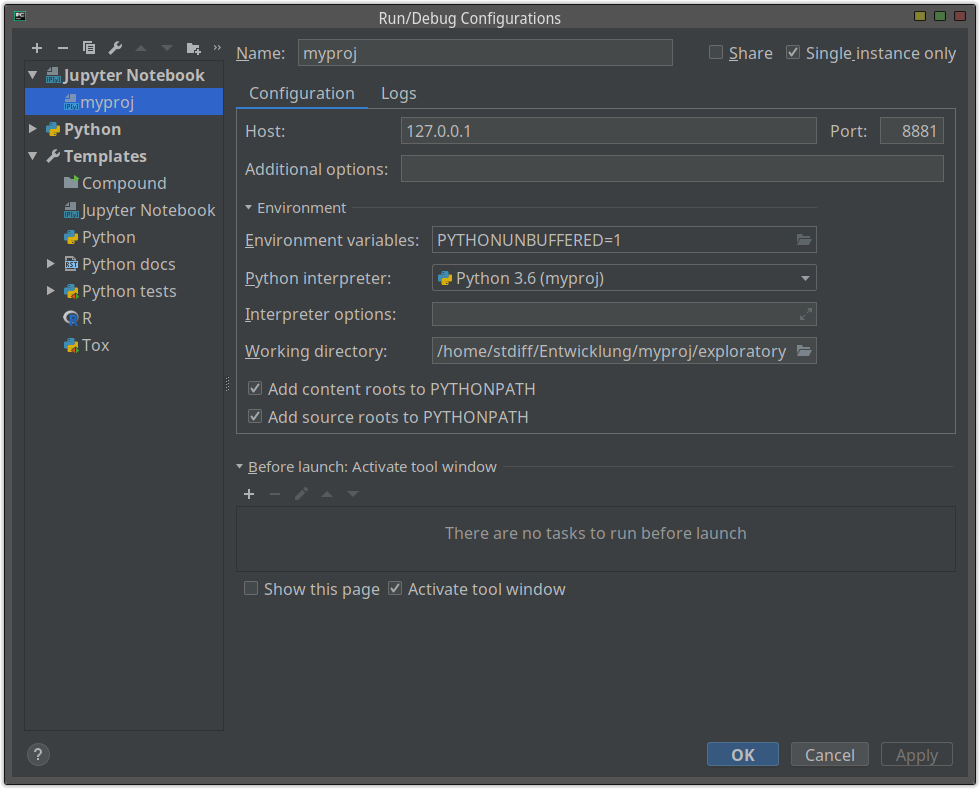
Pycharm supports Jupyter Notebook. This sounds very good and I thought that this could be the best method.
You can also give a custom settings:

Since you are working on PyCharm, you can take advantages of PyCharm IDE such as completion, key-binding, coding checker and so on. But
- display is so buggy, that I can not print a large DataFrame.
- There is no save button to save the notebook and create the paired Python script.
- You may need some workarounds to display a good diagram.
Because of these problems I do not use Jupyter via PyCharm. But I wish that the Jupyter-support of PyCharm gets better, so that we can always use it.
5.3 use Both
As you see the demo of jupytext, you can also edit the paired Python script
to edit the Python notebook instead.
In my opinion you need to use Jupyter Notebook as a main tool. The reason why we chose a Python script as a pair of a notebook file instead of Markdown is exactly to use PyCharm as a helper tool. If you choose a Markdown, then it might not be convenient to edit.
I think that jupytext lacks a function, which puts the line
if __name__ == "__main__":. If such a function is available, then we can use
the paired Python script as a module, so that it is easy to test/use a
function in the code.
Let's start your analysis!
This blog entry is quite long, but what we have to do is not so complicated. Basically just two things.
- Create and use a suitable Anaconda environment and
- Manage versions of your progress via git.
Following these two processes, you can avoid problems which can happen because you work with colleagues.
These processes are based on git. I am quite sure that many of data scientists/analysts are not familiar with git. But if you have not use git yet, I strongly recommend learning it and using it at work.

